How to Set up and Use Post-Show Reconciliation With Captello
Last updated: September 29, 2026
Overview
Some shows do not provide an API Devkit for lead scanning but offer a post-show reconciliation service, which allows you to get the contact information of captured leads after the event.
Other shows will have some information encoded on badge, along with a turnicated email and/or phone.
Captello natively supports both cases, allowing you to use the badge scanner in a post-show reconciliation setting, allowing auto-transcribing information printed on badges, collecting information encoded in barcodes/QR codes, filling qualifying information, and seamless exporting of badge IDs to reconcile on the registration provider's side to retreive the missing contact information.
Setting up The Capture Form
Click on the scanner field
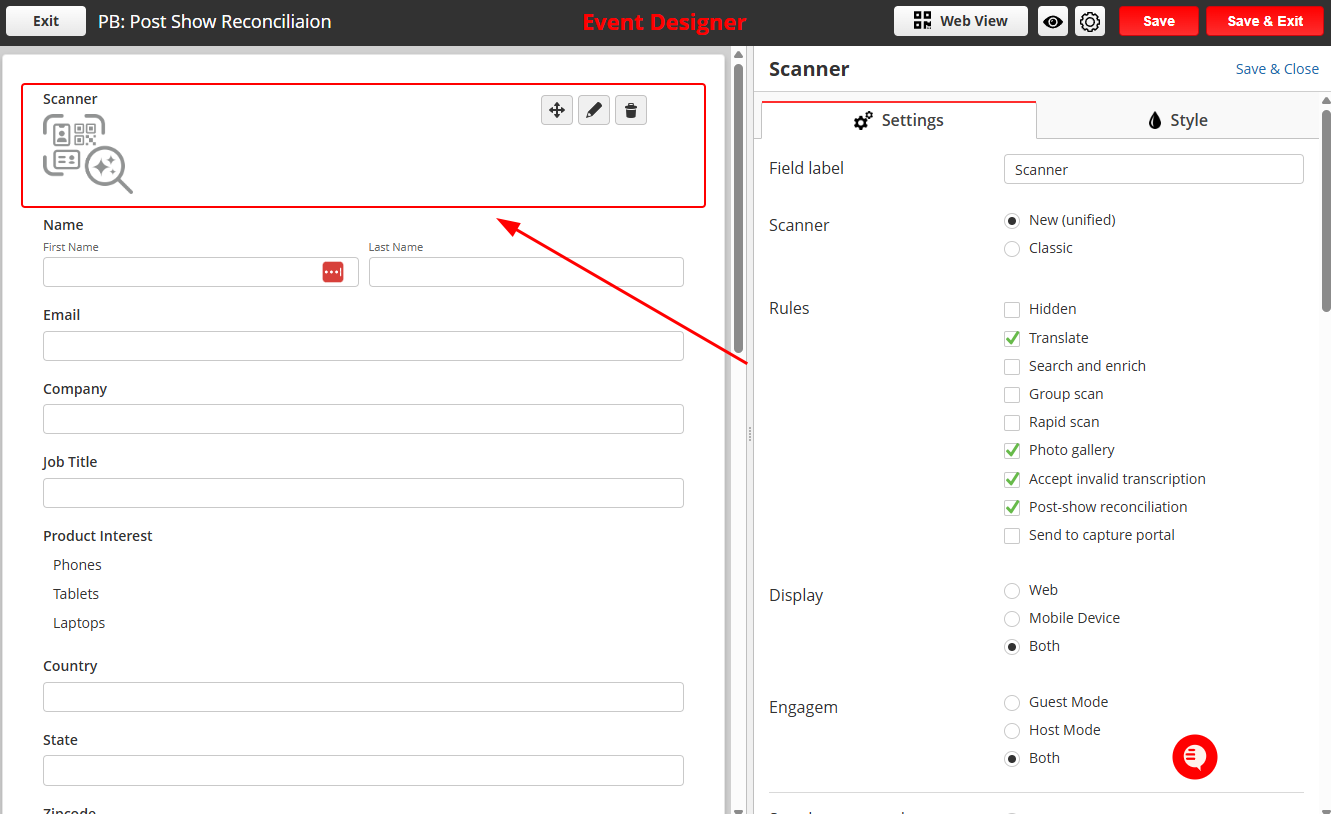
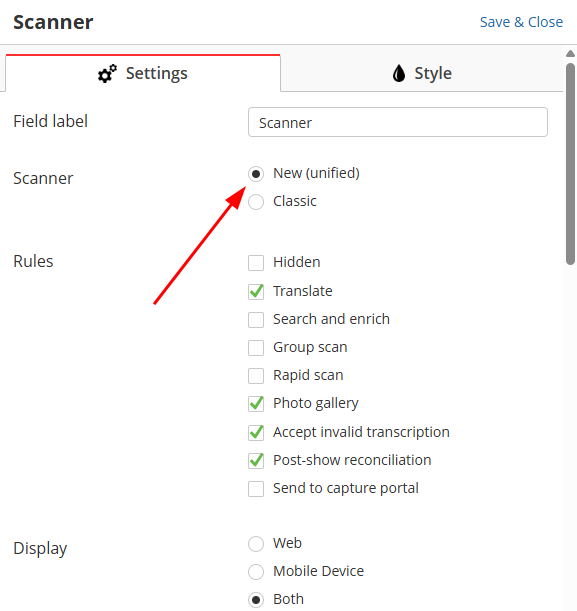
Select New (Unified) mode.
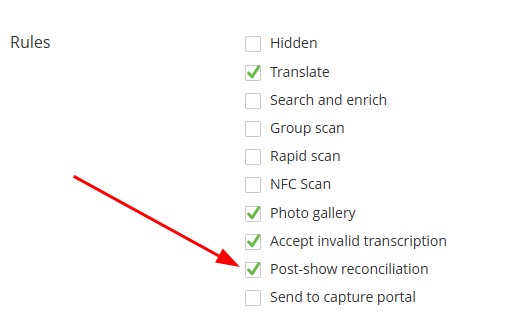
Check the 'Post-show reconciliation' box.
Classic mode can work in some cases, however, it's highly recommended to use the unified scanner, as it's a one-size-fits-all solution, whether the show has:
Partly encoded contact information in QR codes.
Or if QR codes only include badge IDs.
It also ensures that any contact info printed on badges is transcribed.
(Optional) Select the transcription language for information printed on badges (Card Language is recommended if you desire the contact information on the badges to be transcribed in their native foreign langauge).
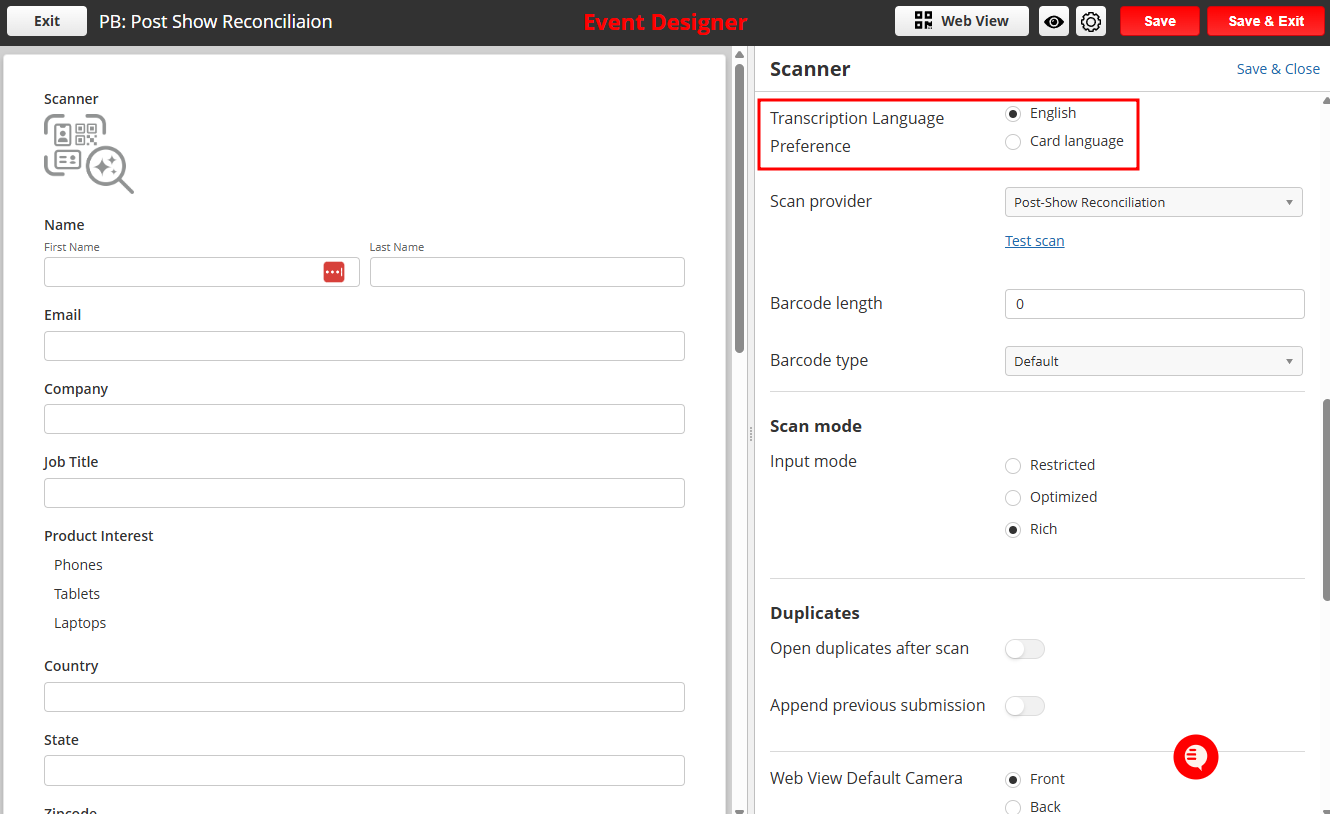
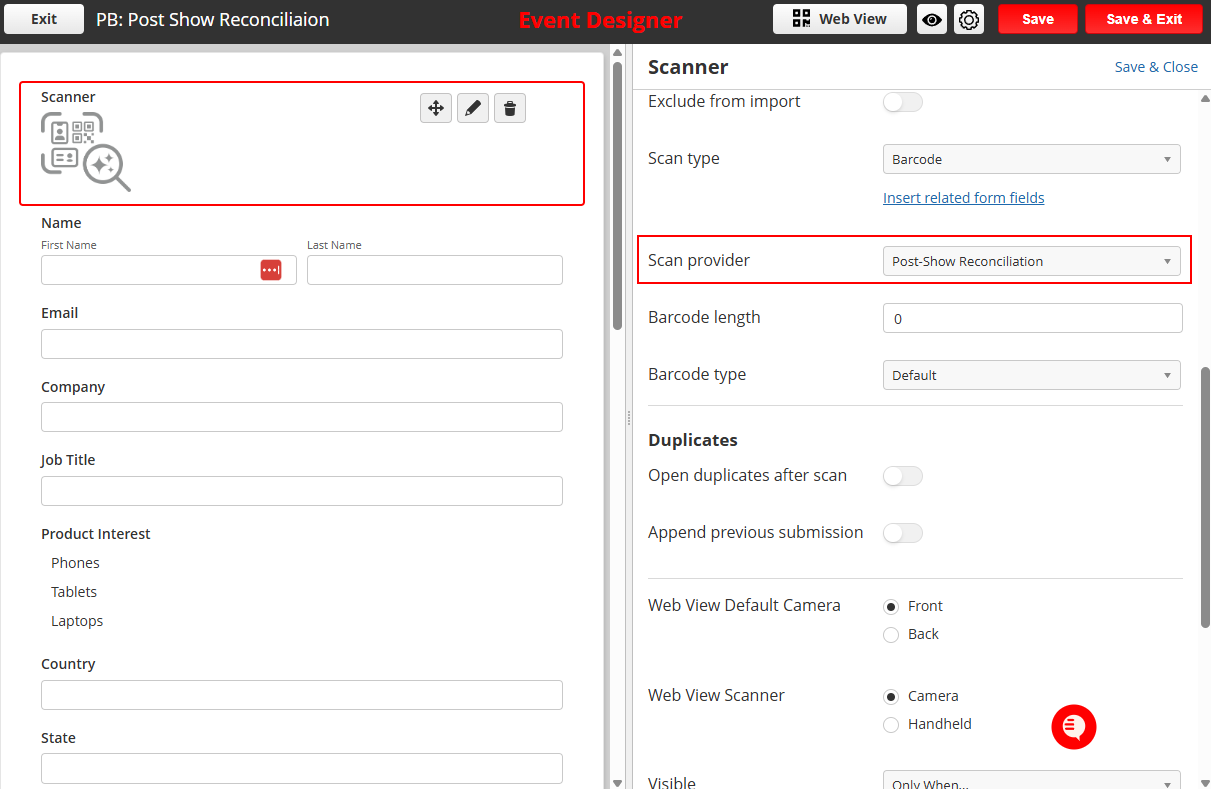
From Scan Provider, select Post-Show Reconciliation
From Scan mode, select 'Rich'. This ensures that contact information printed on badges are transcribed, in addition to collecting badge IDs from barcodes/QR codes.
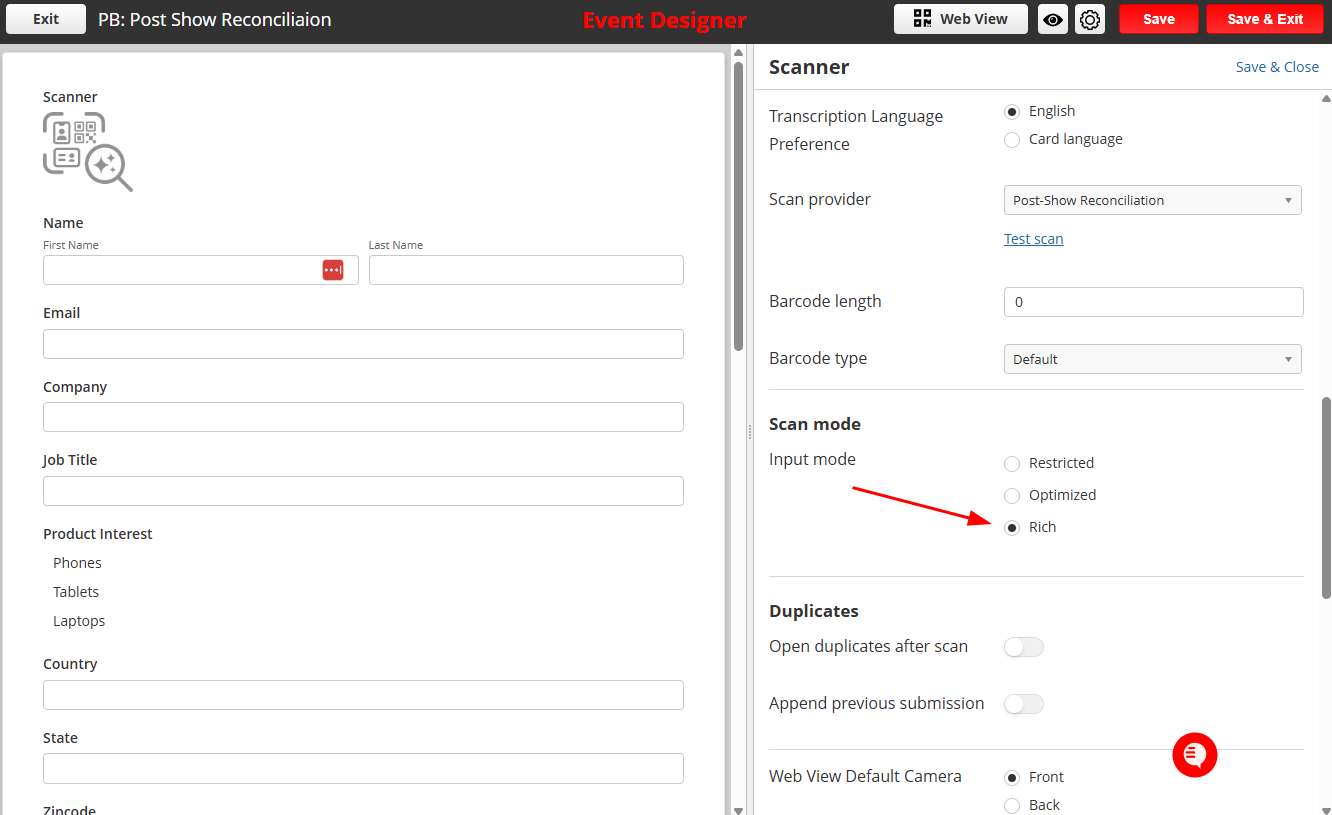
You may select 'Optimized' instead of 'Rich' only if every single person in your event staff has a modern, flagship phone (ex. Samsung S20 and up, iPhone 16 and up). Refer to this comparison for more info.
Transcription is not available with the Classic scanner mode.
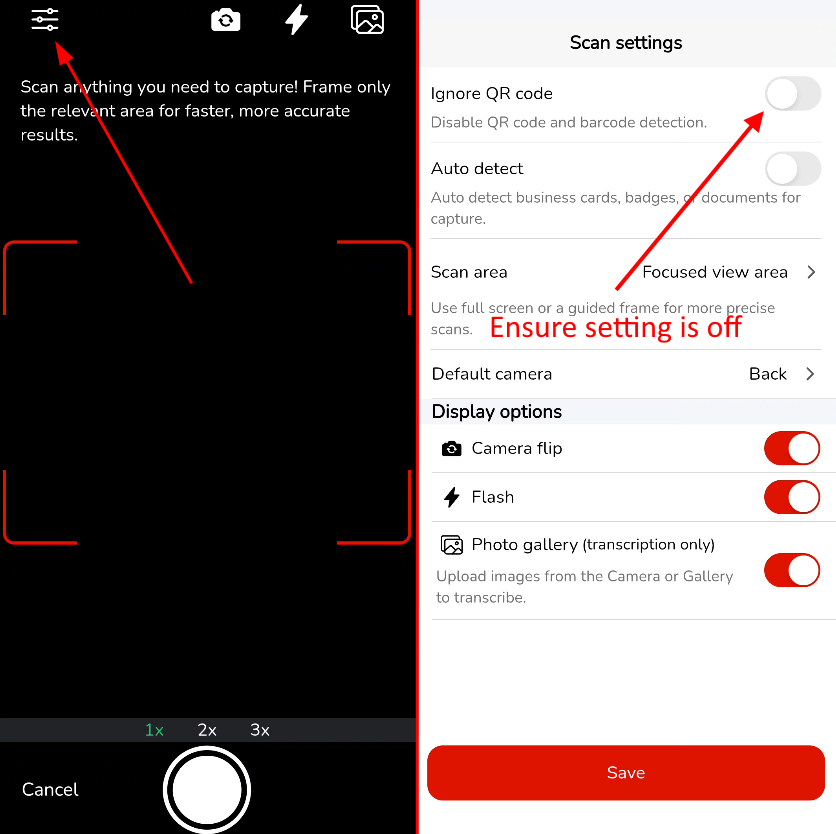
On your event staff member devices, ensure that the Ignore QR code setting is turned off. This is a per-user setting. It's off by default.
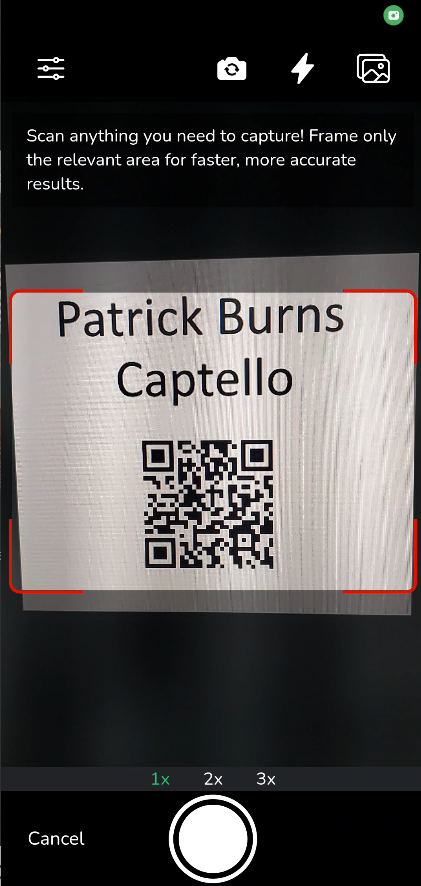
During scanning, do not touch the camera button. Instead, point the camera to have the full badge in the view finder and let the camera auto detect it.
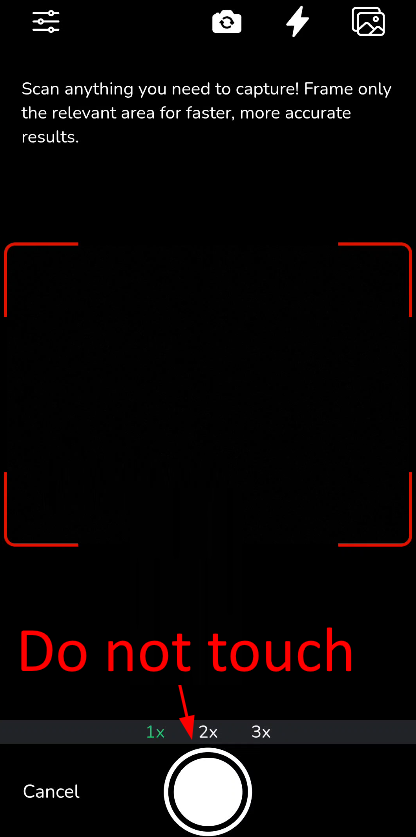
If you press the camera button, it will make the scanner take a picture to run through the Enrichment Waterfall, instead of the process of transcribing + saving the badge ID.
Scanning Badges
Make sure to:
Not click the camera button
Include the whole badge in the view finder
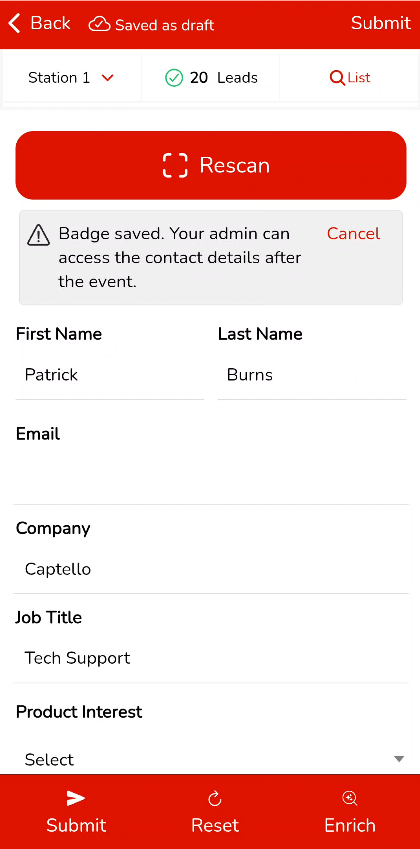
A disclaimer will be displayed that the full contact details will be available after the show. That's okay! Keep filling the qualifying information as you normally would, and
tap Submit.
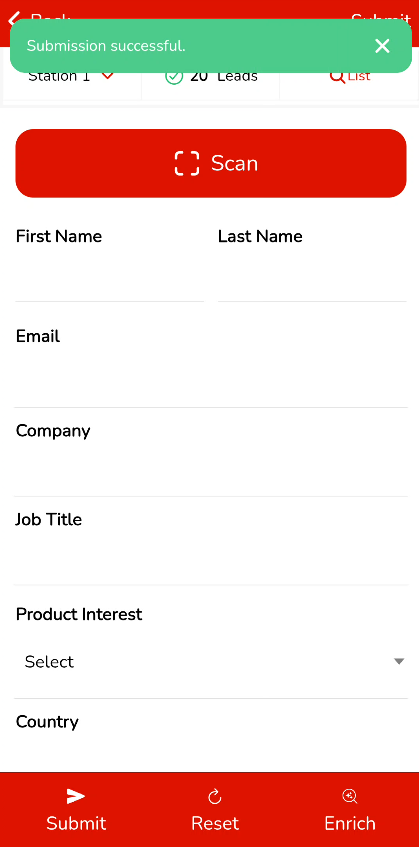
You will get a 'Submission successful' message.
Once you are done capturing leads at the event, the next step is to reconcile them on the provider's database. First, the lead badge IDs must be exported from Captello.
Exporting Badge IDs
To export Badge IDs of post-show leads, follow the steps below:
Click on the 'Alert Center' icon, and then on 'Capture Portal'.
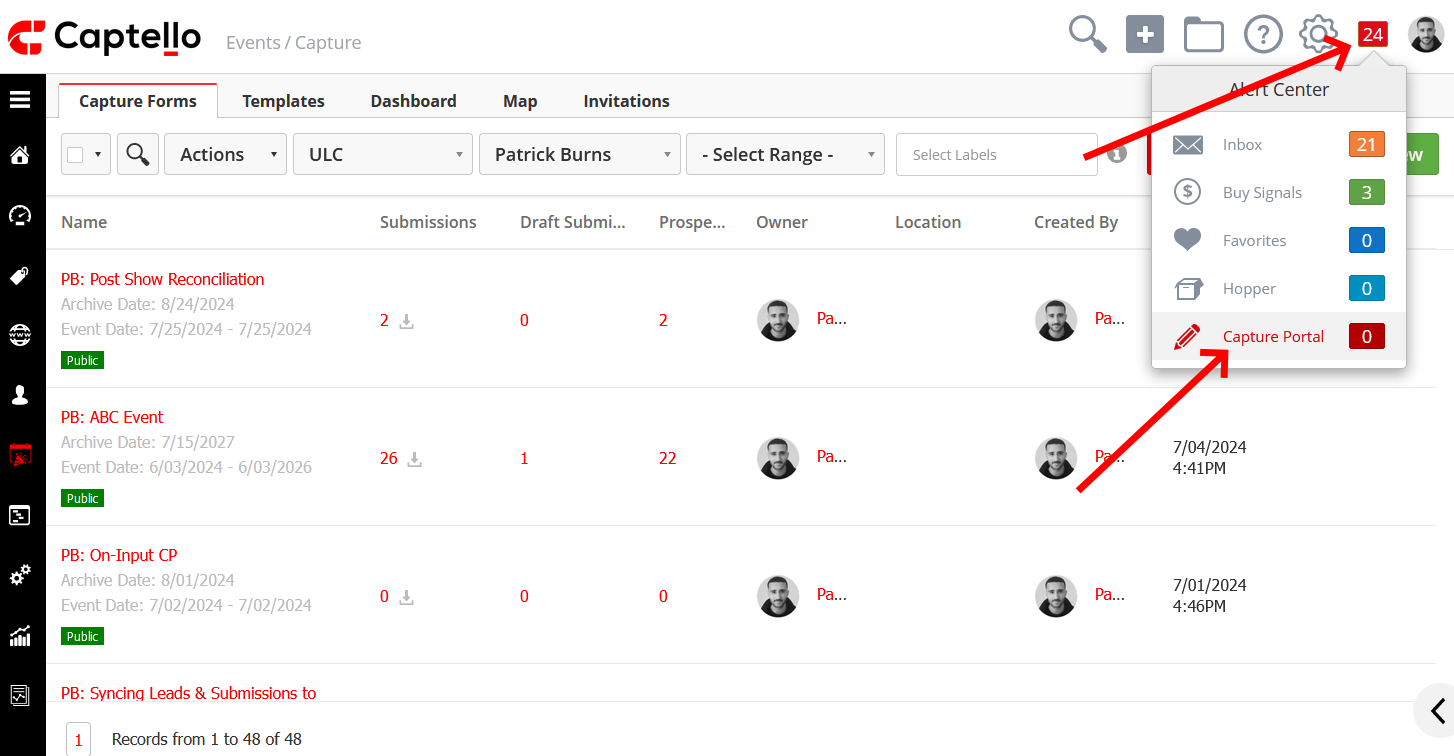
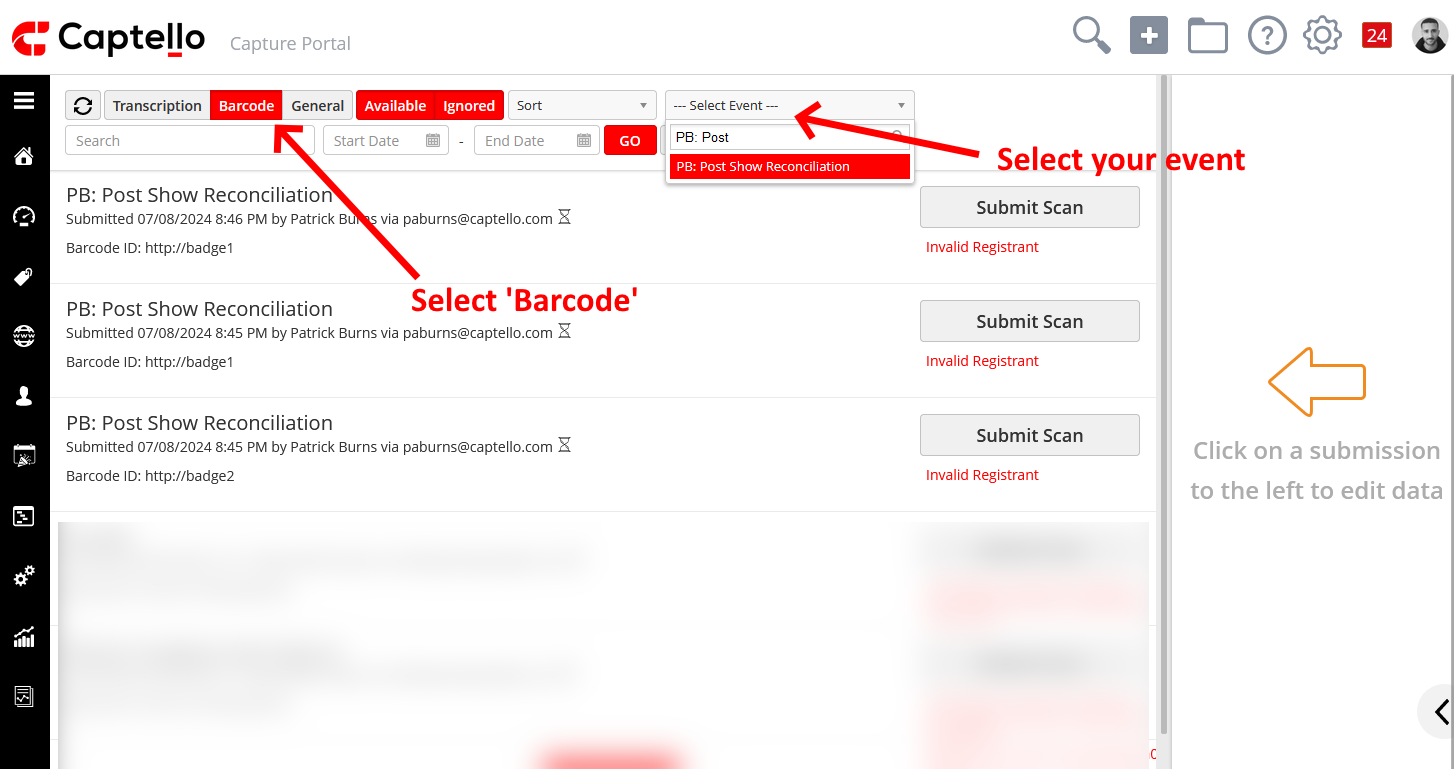
Select your event from the drop-down and select 'Barcode'.
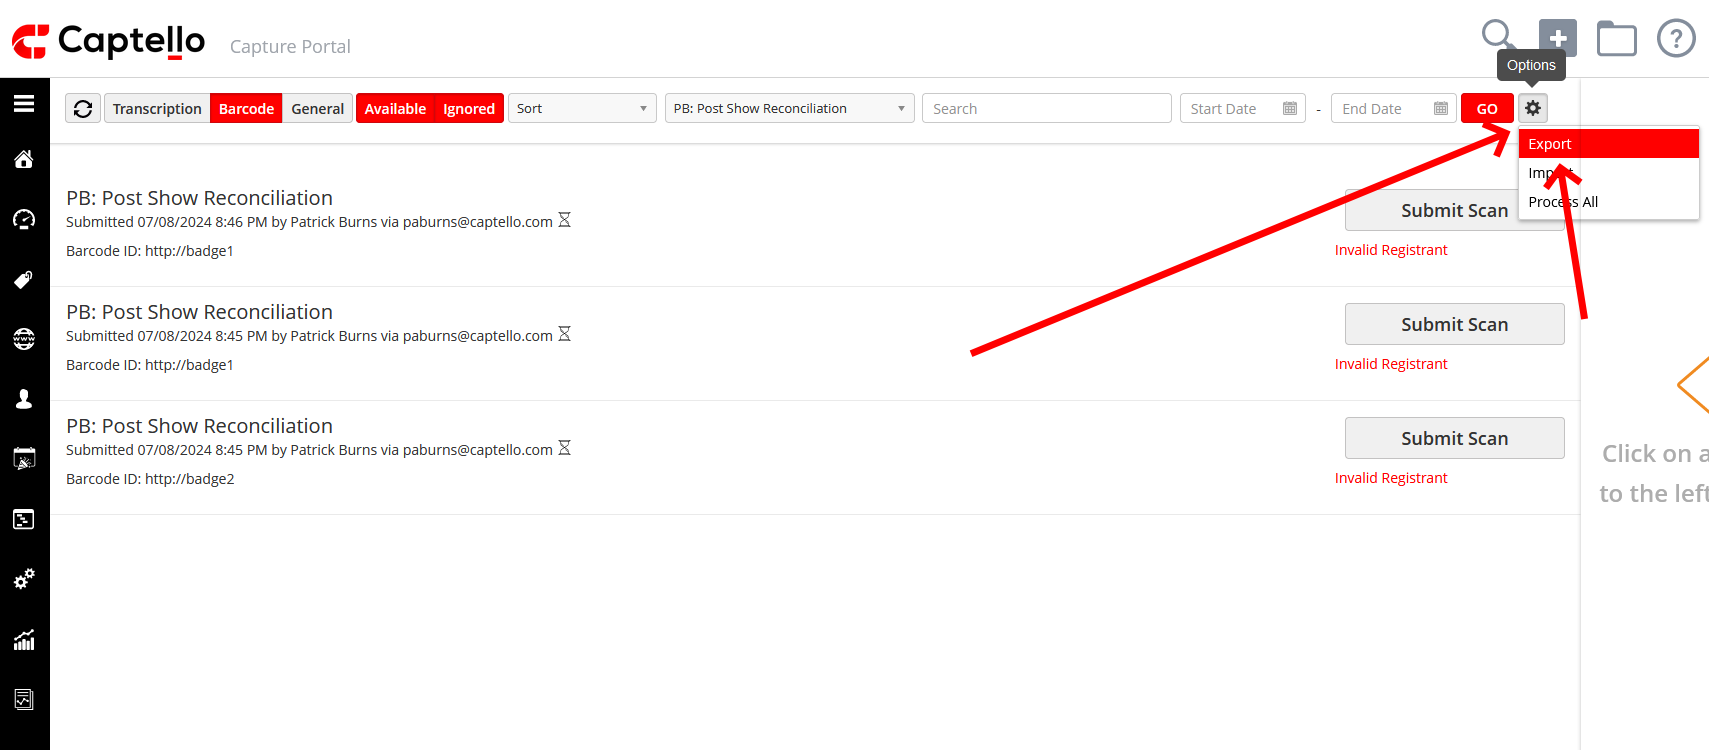
Click on the 'Options' drop-down and click 'Export'
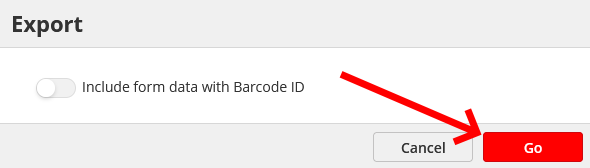
Click 'Go', and a spreadsheet will be downloaded, including badge IDs.
Reconciling Data on the Provider's Database
Some providers will require you to send them the spreadsheet and will reply with the contact information sheet,
Other providers will have portals where you can upload the file and get the contact information right away.
Once you get the spreadsheet with contact information from the provider, go ahead and upload them to Captello following the steps below:
Uploading Contact Details to Captello
Navigate to the Capture Portal again.
Select your event.
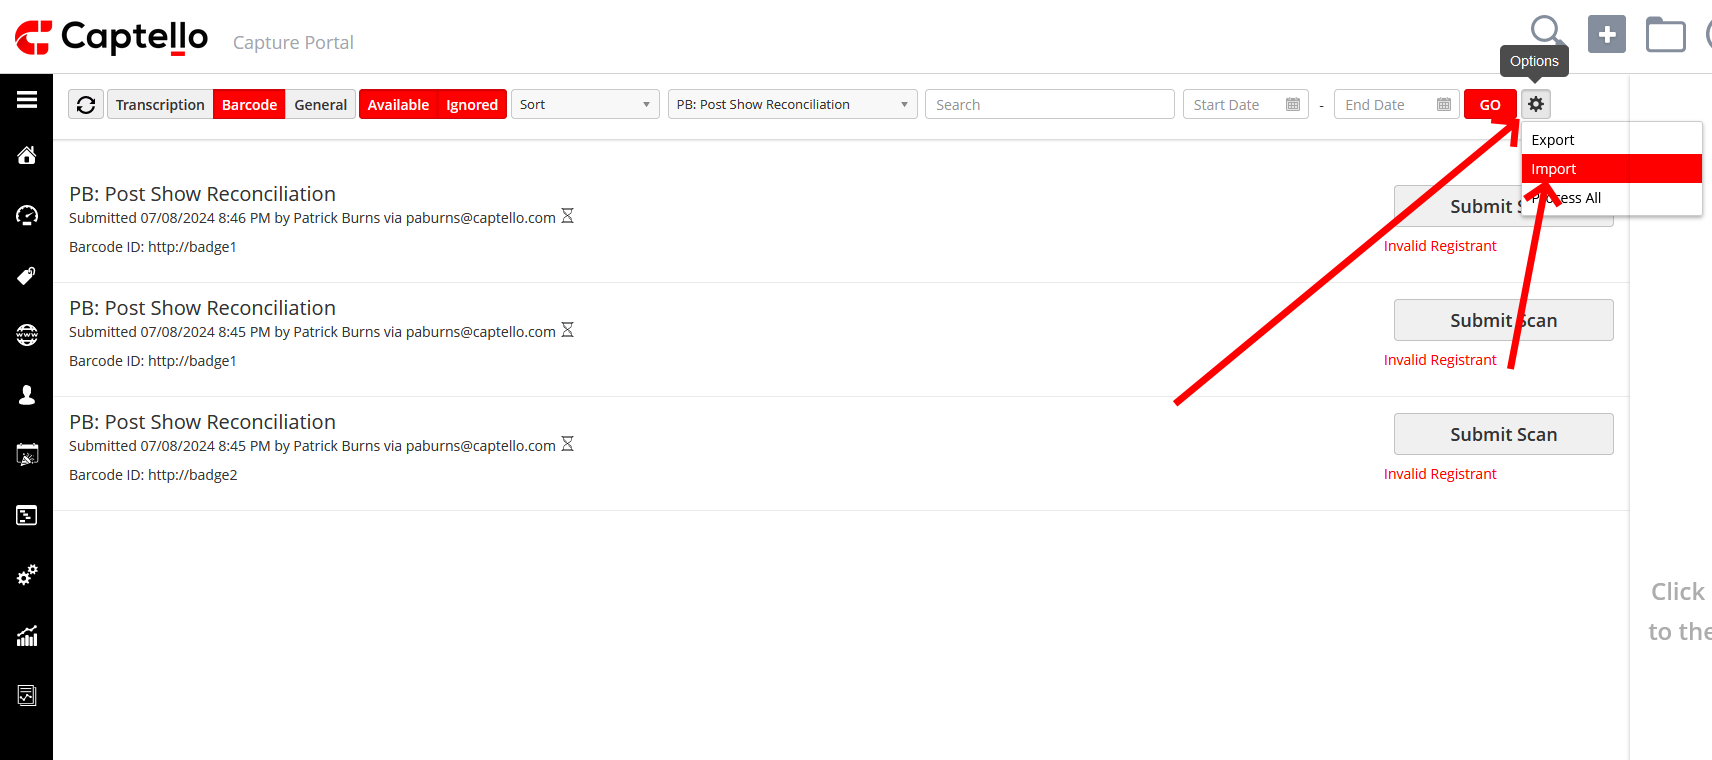
Click the 'Options' drop-down and click 'Import'.
Click 'Upload File' and select the contact details spreadsheet.
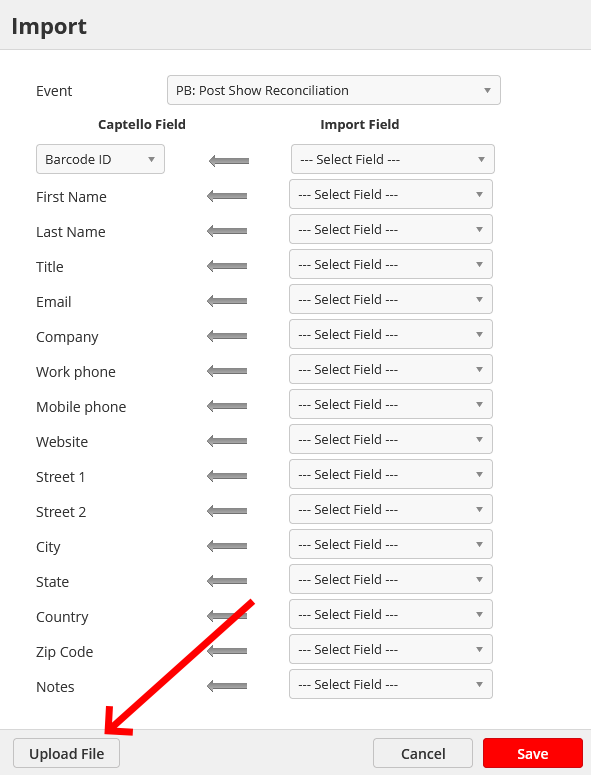
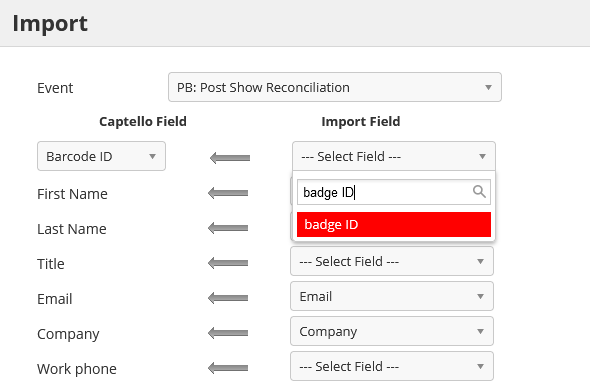
Map the 'Barcode ID' and any other contact fields you need.
In this example, the 'Barcode ID' had to be mapped to 'badge ID' on the sheet.
Once you have mapped all contact information, click 'Save'.
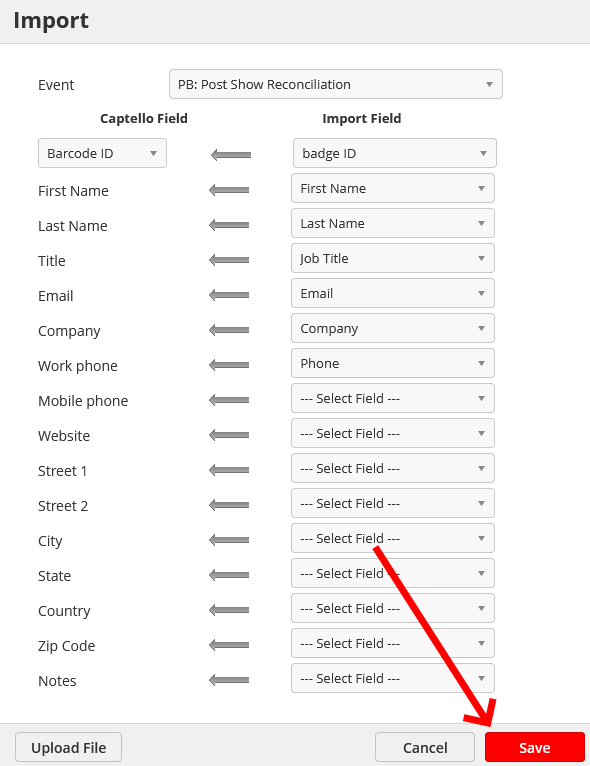
You will get a success message confirming that the leads are getting submitted to the form, merging their contact details with the captured qualifying information.

The more leads you have, the longer it will take for the submissions to count.
Also note that: Fulfillment actions set up on the form (such as follow-up emails) will be taken for imported leads.
Congratulations! You have now completed the post-show reconciliation process!
If you have any questions, feel free to contact us.